


Awhile back, I introduced a prototype
for a concept instrument I had been working on: a capacitive touch
digital handpan. Since then, I’ve taken the project to the next level by
turning it into an actual instrument that can be played by itself or
with other instruments!
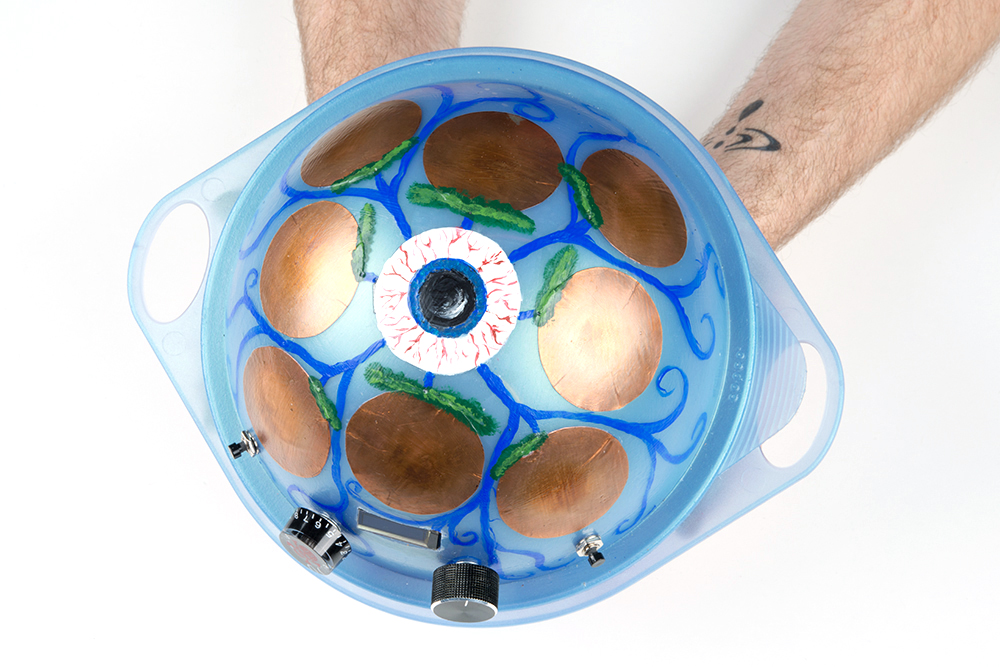
 After searching high and low for the perfect enclosure, I came upon an old head of lettuce container at a local thrift shop. It ended up being the perfect size and shape for what I wanted.
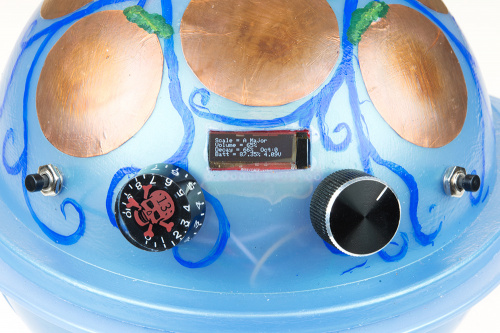
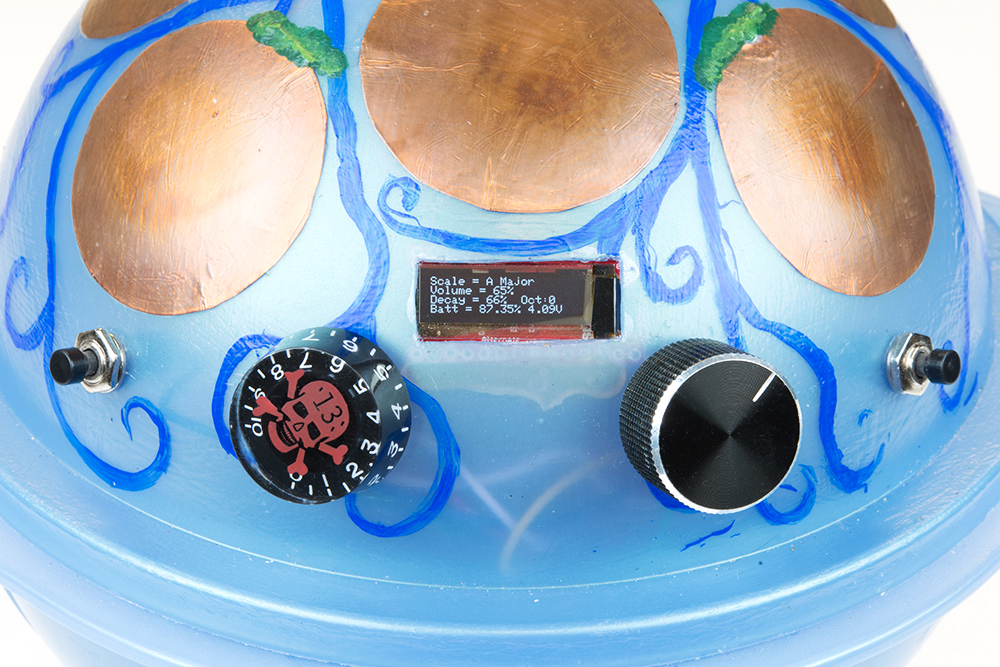
I started by cutting out circles of copper tape and adhering them to the top portion of the container. Tiny holes were drilled to pass through small gauge wire and solder it to the tape. I attached the pads to the prototype to ensure that they would still behave as expected. After a successful test, I went to work adding the rest of the interface to the top half, including the buttons, potentiometers and the Teensy View screen.

The OLED screen displays useful information, including the current
musical scale and the key (or tonic) of the scale, volume, decay, the
current octave, and the current battery percentage and voltage.
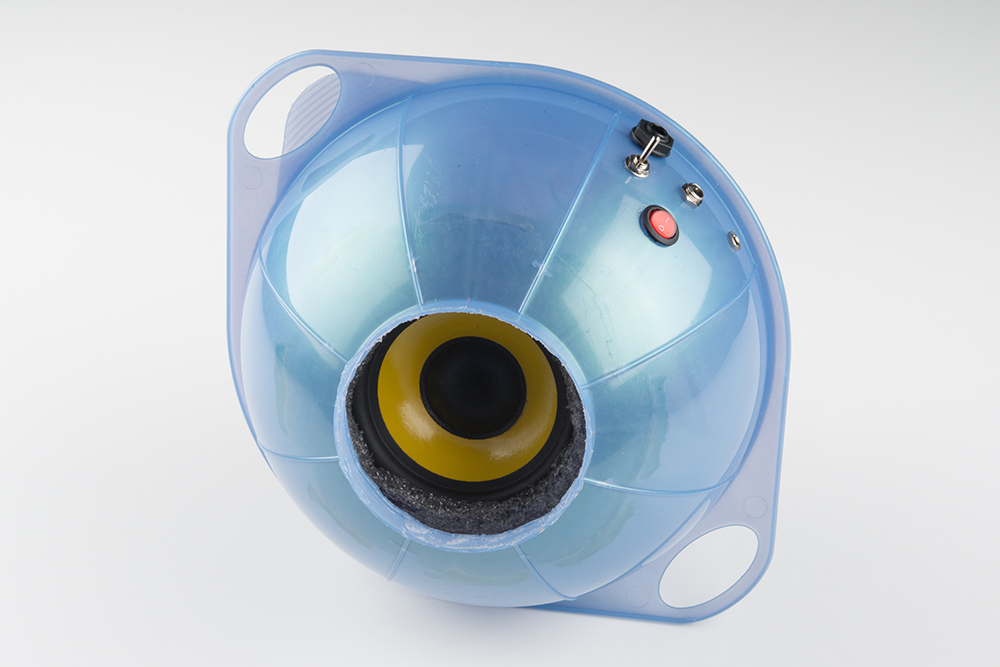
 The bottom of the container was cut out to allow a speaker to sit
nicely inside the enclosure and produce sound out the bottom of the
drum.
The bottom of the container was cut out to allow a speaker to sit
nicely inside the enclosure and produce sound out the bottom of the
drum.
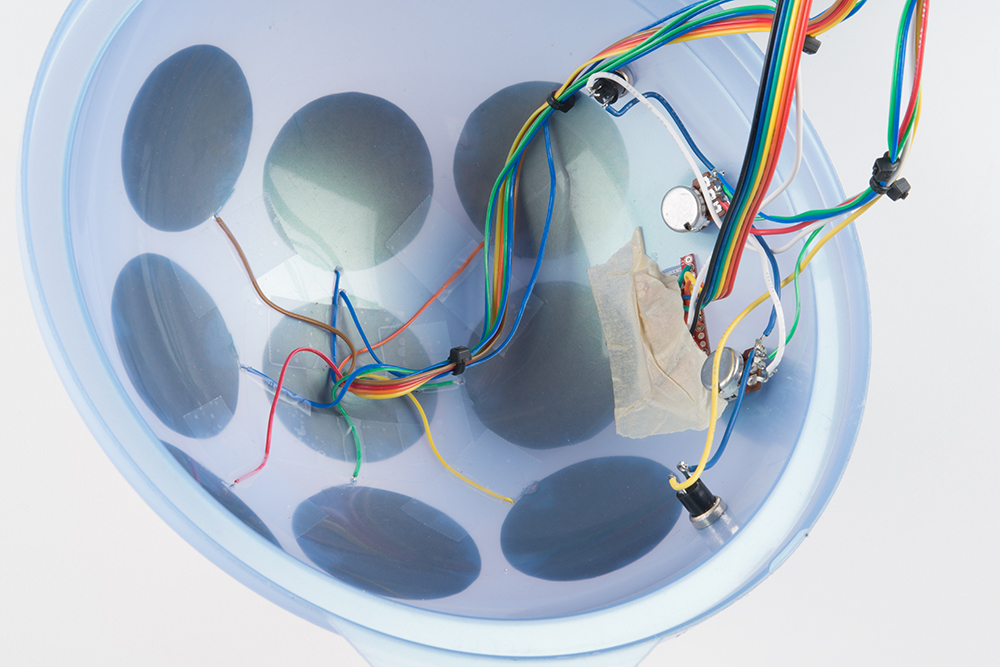
 Inside the drum, a snappable protoboard was used to contain all the electronics, which sit on a plastic platform on top of the speaker. At the center of it all is a Teensy 3.2 and a Teensy Audio Shield. A SparkFun LiPo Fuel Gauge is used to provide the battery statuses, and a 5V/1A Charger/Booster to handle charging and boost the battery voltage to 5V to power the audio circuitry.
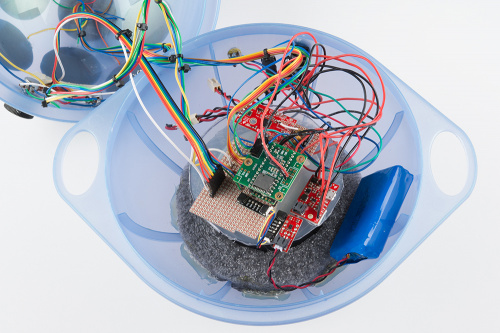 Fellow SparkFun Engineer Marshall, who helped tremendously with this project, persuaded me to try out his technique of using a motor driver as an amplifier. It worked surprisingly well, so I left it in this design. However, using a Mono Audio Amp Breakout would work just as well and is likely more user-friendly.
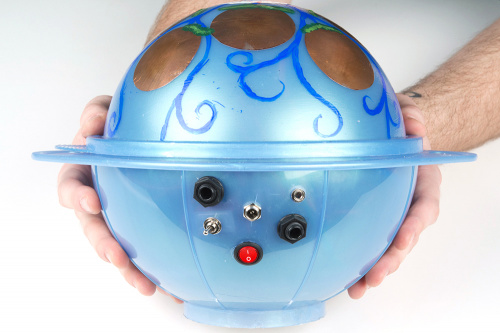
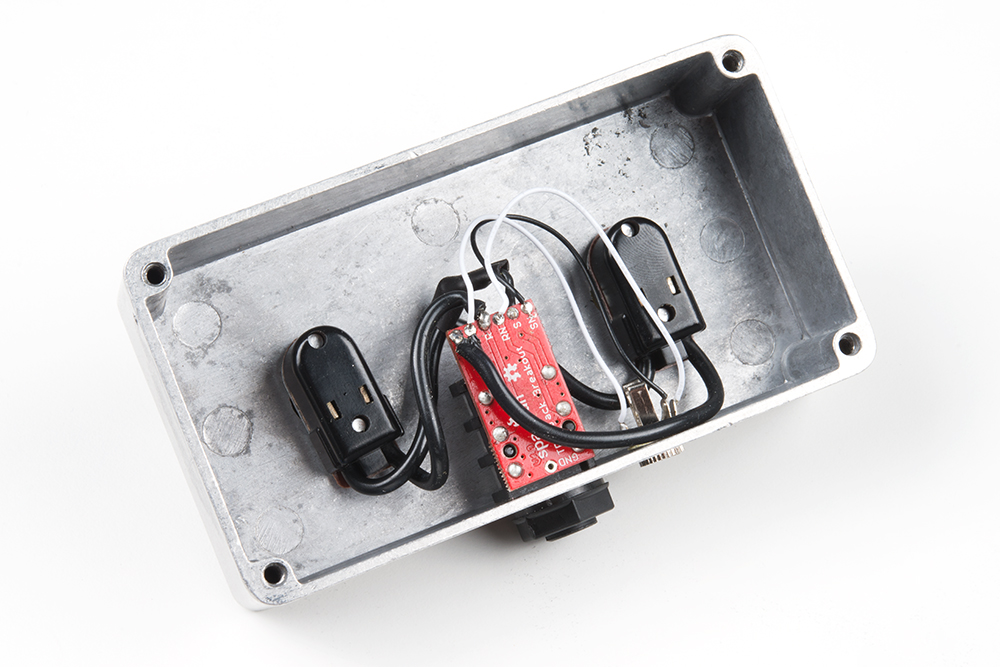
 On the back is the remainder of the user interface. There is ¼" jack
to provide line-out audio and a switch to switch between line out and
the internal speaker. The red switch controls power, and the barrel jack
above allows 5V in to charge the LiPo.
On the back is the remainder of the user interface. There is ¼" jack
to provide line-out audio and a switch to switch between line out and
the internal speaker. The red switch controls power, and the barrel jack
above allows 5V in to charge the LiPo.
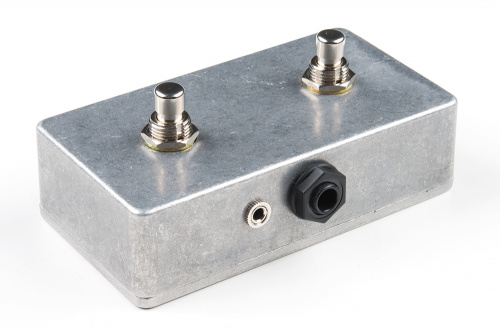
 Last, to give the drum a little more functionality, I added one more
¼' jack on the back that connects to switches on a foot switch to two
digital pins on the Teensy. These switch changes increment or decrement
the current octave. I wanted to be able to use the foot switch with
professional audio equipment, such as the BOSS RC-30 Loop Pedal, so it was modeled after the BOSS FS-6 Dual Footswitch.
Most professional audio foot switches, including the FS-6, use a
normally closed (NC) switch vs. the normally open (NO) switch found more
commonly in embedded electronics. I found some NC switches from this Guitar Pedal Parts site.
Note that a stereo cable must be used to utilize both of the switches.
An additional 3.5mm jack was added just as a secondary cable option.
Last, to give the drum a little more functionality, I added one more
¼' jack on the back that connects to switches on a foot switch to two
digital pins on the Teensy. These switch changes increment or decrement
the current octave. I wanted to be able to use the foot switch with
professional audio equipment, such as the BOSS RC-30 Loop Pedal, so it was modeled after the BOSS FS-6 Dual Footswitch.
Most professional audio foot switches, including the FS-6, use a
normally closed (NC) switch vs. the normally open (NO) switch found more
commonly in embedded electronics. I found some NC switches from this Guitar Pedal Parts site.
Note that a stereo cable must be used to utilize both of the switches.
An additional 3.5mm jack was added just as a secondary cable option.
 The switches and jacks are housed within a SparkFun Aluminum Enclosure, which provides a very robust enclosure.
 To see the Touch Drum in action, check out the video below.
A majority of the parts used to build the Touch Drum can be found in the wish list below. Additional supplies needed include an enclosure to house your drum and a speaker.
I started by cutting out circles of copper tape and adhering them to the top portion of the container. Tiny holes were drilled to pass through small gauge wire and solder it to the tape. I attached the pads to the prototype to ensure that they would still behave as expected. After a successful test, I went to work adding the rest of the interface to the top half, including the buttons, potentiometers and the Teensy View screen.
Note: I added a ninth pad but ended up not using it in the final design.


Materials
A majority of the parts used to build the Touch Drum can be found in the wish list below. Additional supplies needed include an enclosure to house your drum and a speaker.


No comments:
Post a Comment